Are you, your relatives, friends graduating this summer? Can't find a perfect gift for them? Are flowers, bears too common and afraid that the gifts cannot express how happy you feel for them? Well... I have been asking myself this question when I attend my friend's graduation.
I mean.. Everyone around me are buying bears, flowers, or going there empty handed. Okay, flowers and bears are probably already the essential part of graduation gifts, but why not make something your own?
I mean.. Everyone around me are buying bears, flowers, or going there empty handed. Okay, flowers and bears are probably already the essential part of graduation gifts, but why not make something your own?
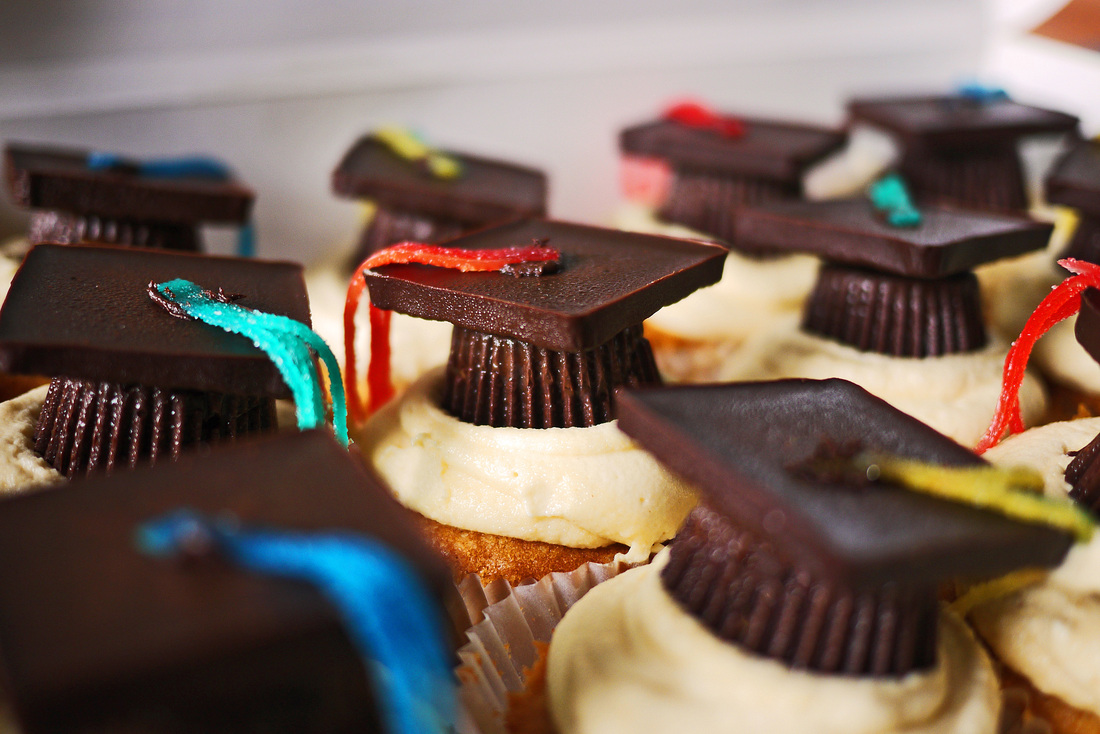
Look at how cute they are? Aren't they just look and represent what this graduation is all about? Your gift will definitely be a spotlight when you present this to your graduation partners.
p.s: Weather here in Singapore is way, way, WAY too hot and humid. I only took these cupcakes out of the fridge for 5 minutes and my chocolate "sweats". Ooh well.. Can't help it anyway.
p.s: Weather here in Singapore is way, way, WAY too hot and humid. I only took these cupcakes out of the fridge for 5 minutes and my chocolate "sweats". Ooh well.. Can't help it anyway.
If you can find instant peanut butter cups like Reese, and squarish thin chocolate like After Eight, by all means, use them. It's kind of hard to find them here, from where I live, or rather, I am lazy to travel far to purchase them, and it's also a good excuse to use up my chocolates at home, I do them myself.
Doing them yourself is cheaper, and of course, you will learn how to temper your chocolate because I am going to teach you how to!
By tempering, I don't mean being angry with your chocolate or anything along that line. (CRAP, ain't a good joke, but please laugh)
What I mean is, maintaining the hardness of the chocolate, not melting in room temperature, maintaining the shine and having that 'snap' when you break the chocolate, just like store bought!
Why do we need to temper chocolate? Of course, of the above reasons I have said, tempering chocolate ensures that you can melt the chocolate and yet, maintaining the quality of what a snapping chocolate should have. Also, when we temper the chocolate, when it sets in the mould, it will be easy to retrieve from the mould as the chocolate will retract and not stick to the mould.
When we buy a real chocolate, the cocoa butter molecules are interlocked with each other, that's the reason why when we break chocolate, it snaps. When we melt chocolate, the cocoa butter molecules start to break apart and if we don't temper the chocolate, which is bringing the temperature up and down to a certain degree, the cocoa butter will not be bonded together. Instead, it will just be some random pattern in the chocolate. And that is why there won't be any 'snapping' when you try to break the chocolate after being set in the fridge.
What is a REAL chocolate? Well, if you see the ingredients listed in the packaging of each chocolate, you will see COCOA BUTTER as an ingredient. If it doesn't contain cocoa butter, but contain other kinds of fat such as vegetable shortening, this is what we call as compound chocolate.
Compound chocolate doesn't need to be tempered and it sets at room temperature. Good for decoration, but not nice to be eaten as it's own. (Just recall the taste of your chocolate coins that you receive when you were younger.) If you are using compound chocolate, just melt them and place in moulds. You may skip till 3 photos later.
When we temper chocolate, there is a lot of ways to do it. By using a thermometer, bench scrapping method etc, but I am going to teach you a simplest method. Of course! I can't do complicated stuffs as well.

The easiest way to temper a chocolate, is to set aside a portion of chocolate and melt the rest first, and then adding the rest in to bring the temperature down.
A guide is to chop up your chocolates into very fine pieces, using a sharp knife. I actually took a lot of beautiful photos of the chocolate, but the chocolate was so delish that my camera ate it all. I only have the above photo. Boohoo.
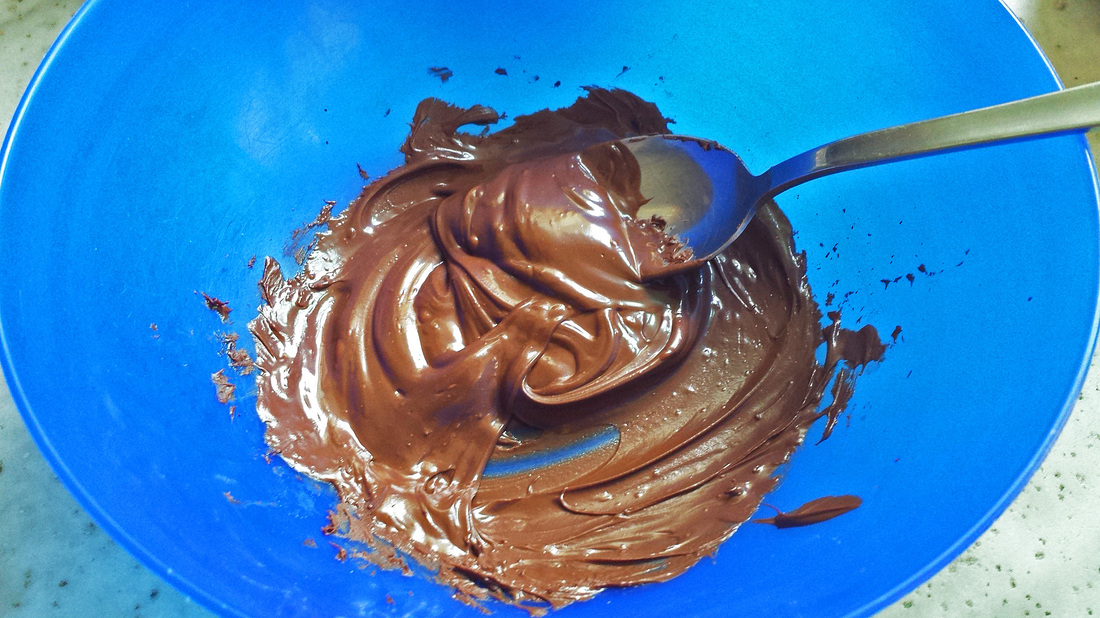
In anyway.. place two-thirds of the chocolate into a microwavable bowl, or heat resistant bowl. I prefer my this heat resistant plastic bowl, because it does not retain heat that will further melt my chocolate after I bring it off the stove or out of microwave. Reserve the one-third for later.
If you are using microwave, using a 10 seconds burst and then 5 seconds burst all the way till the chocolate as just melted, stirring after each burst to agitate the chocolate to help melt it. We just want to melt it till it is just melted. Add the reserved chocolate and stir till it's all melted, with additional one 5-seconds burst in microwave.
If you are using a double-boiler (Bain Marie), make sure your water doesn't touch the bottom of the bowl that has your chocolate. Melt the chocolate till it's almost completely melted, and remove from the heat. Continue stirring to melt the rest of the chocolate and add the reserved chocolate in at once and stir till all is melted.
This process is called seeding the chocolate, where you place unmelted chocolate into the melted ones. Like planting a chocolate, if you get what I mean. If you do it correctly, the melted chocolate will be very thick, and will set in room temperature, with no refrigeration needed.
A guide is to chop up your chocolates into very fine pieces, using a sharp knife. I actually took a lot of beautiful photos of the chocolate, but the chocolate was so delish that my camera ate it all. I only have the above photo. Boohoo.
In anyway.. place two-thirds of the chocolate into a microwavable bowl, or heat resistant bowl. I prefer my this heat resistant plastic bowl, because it does not retain heat that will further melt my chocolate after I bring it off the stove or out of microwave. Reserve the one-third for later.
If you are using microwave, using a 10 seconds burst and then 5 seconds burst all the way till the chocolate as just melted, stirring after each burst to agitate the chocolate to help melt it. We just want to melt it till it is just melted. Add the reserved chocolate and stir till it's all melted, with additional one 5-seconds burst in microwave.
If you are using a double-boiler (Bain Marie), make sure your water doesn't touch the bottom of the bowl that has your chocolate. Melt the chocolate till it's almost completely melted, and remove from the heat. Continue stirring to melt the rest of the chocolate and add the reserved chocolate in at once and stir till all is melted.
This process is called seeding the chocolate, where you place unmelted chocolate into the melted ones. Like planting a chocolate, if you get what I mean. If you do it correctly, the melted chocolate will be very thick, and will set in room temperature, with no refrigeration needed.

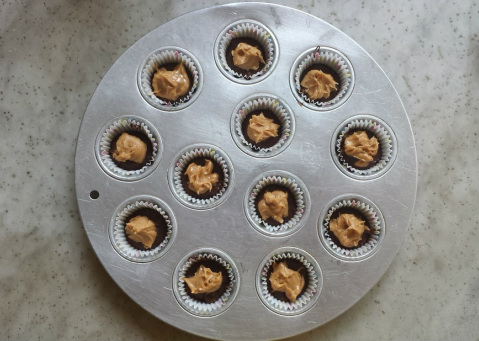
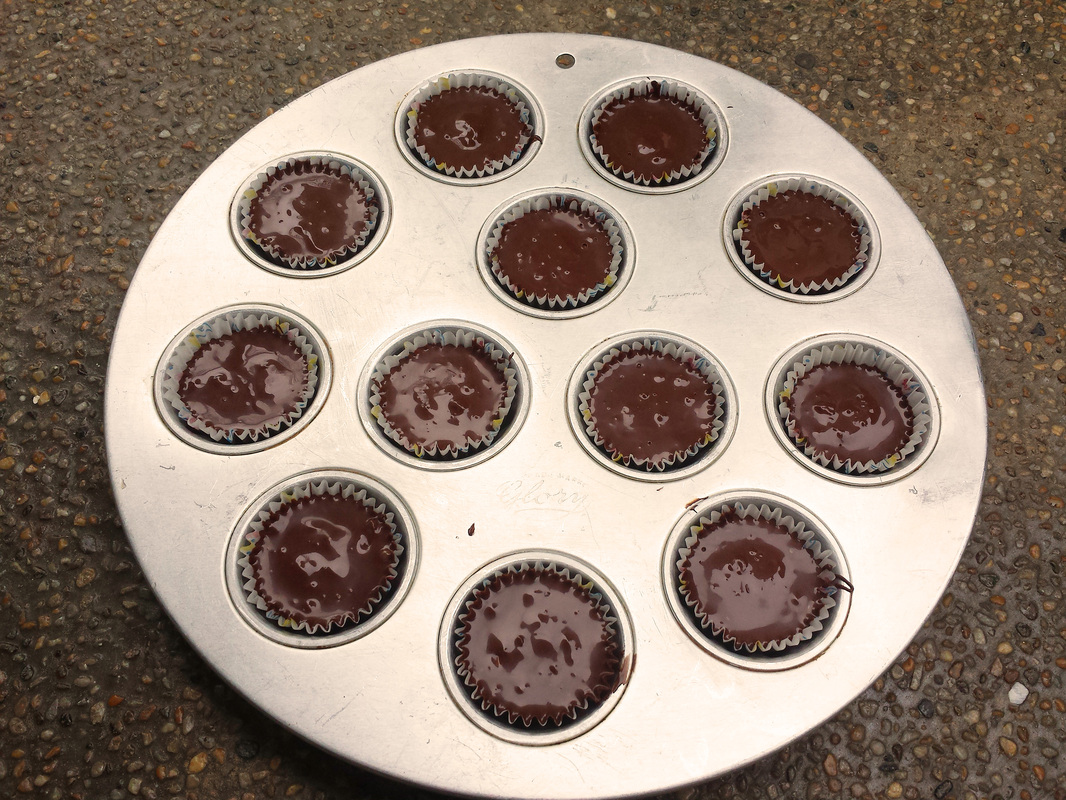
Fill the chocolates up to 1/3 full of the chocolate or full if you do not want to place any fillings in them. I am adding peanut butter in the middle and topping up with the rest of the chocolate. Bang the tray on the table to release some air that might be trapped in the chocolate and allowing the chocolate to fall nicely in the moulds. To let set quickly, you may place in the fridge, but it is not necessary.
If you live in a high humidity place like I am, you will realised that once you chilled your chocolate in the fridge, it will start to "sweat" after a while, after you take them out. Be careful of "sugar blooming", where there will be those white spots you see on the chocolate. When moisture gets onto the chocolate, it will start to melt the sugar that is on the chocolate, which will create a white film on the chocolate. But it's still okay to use and everything else.
How to store your real chocolate:
Place chocolate in a ziplock bag and place in the fridge. When you decide to use them or eat them, take it out from the fridge and let it come to room temperature without opening the bag. Best is to keep the opened pack of chocolate in it's original foil.
How to store your real chocolate:
Place chocolate in a ziplock bag and place in the fridge. When you decide to use them or eat them, take it out from the fridge and let it come to room temperature without opening the bag. Best is to keep the opened pack of chocolate in it's original foil.
Tata! I placed them in the fridge to set and peel the liners off after a few hours.
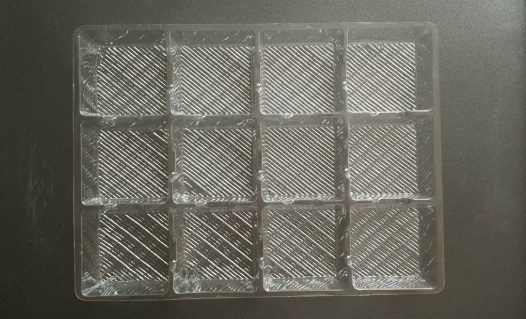
I can't find AfterEight at my nearby local store, and none of the squarish chocolates are big enough to cover my base of the hat. So I decided to buy this plastic moulds. This is actually food containers plastic trays, but they are food safe. And besides, the heat that is on the chocolate isn't that high to melt the plastic. They are more of body temperature. But that's the last resort if you can't find any like me.
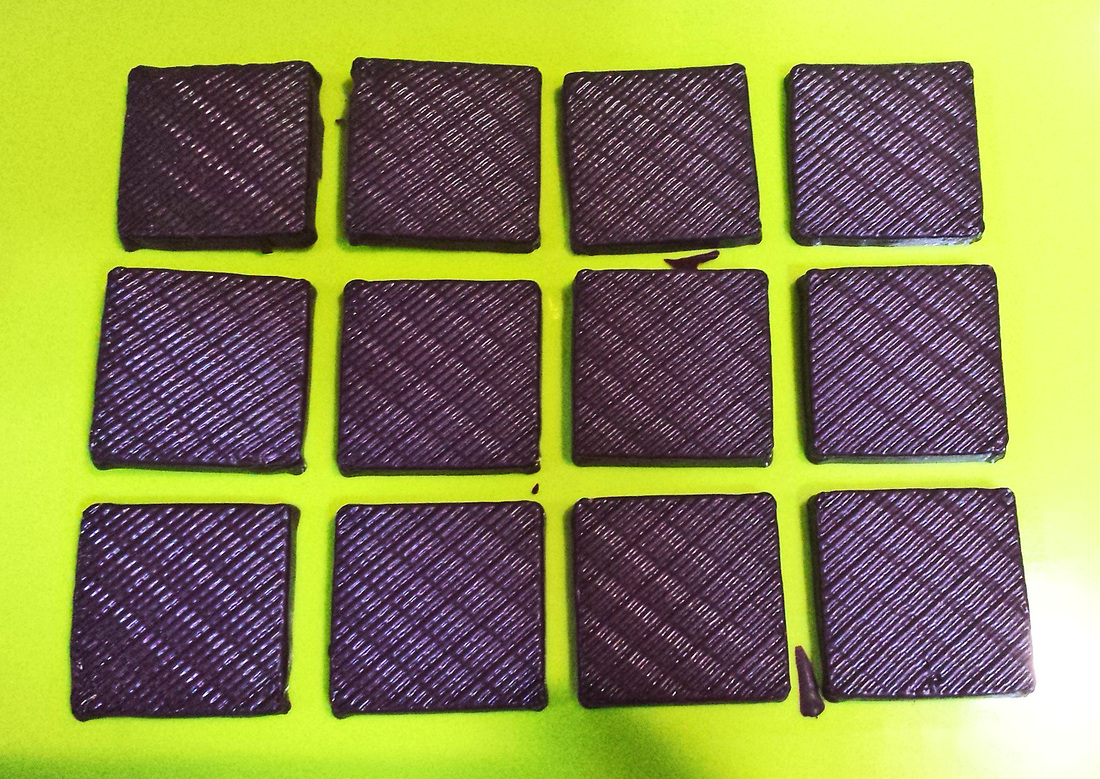
When you tempered your chocolate properly, these will come out as easy as flipping it out!
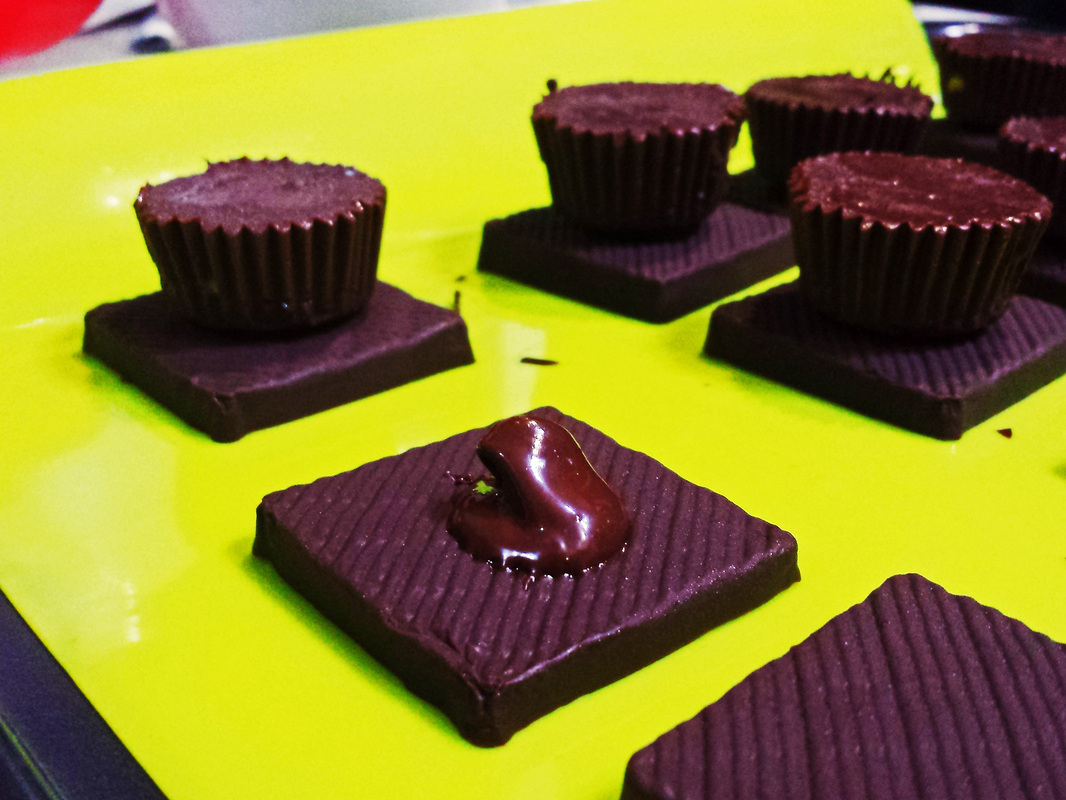
Now, we need some 'glue' to stick the chocolate, so more tempered chocolate to go with! Work fast, if you chilled your chocolate if not the melted chocolate will harden fast. Stick on your base.
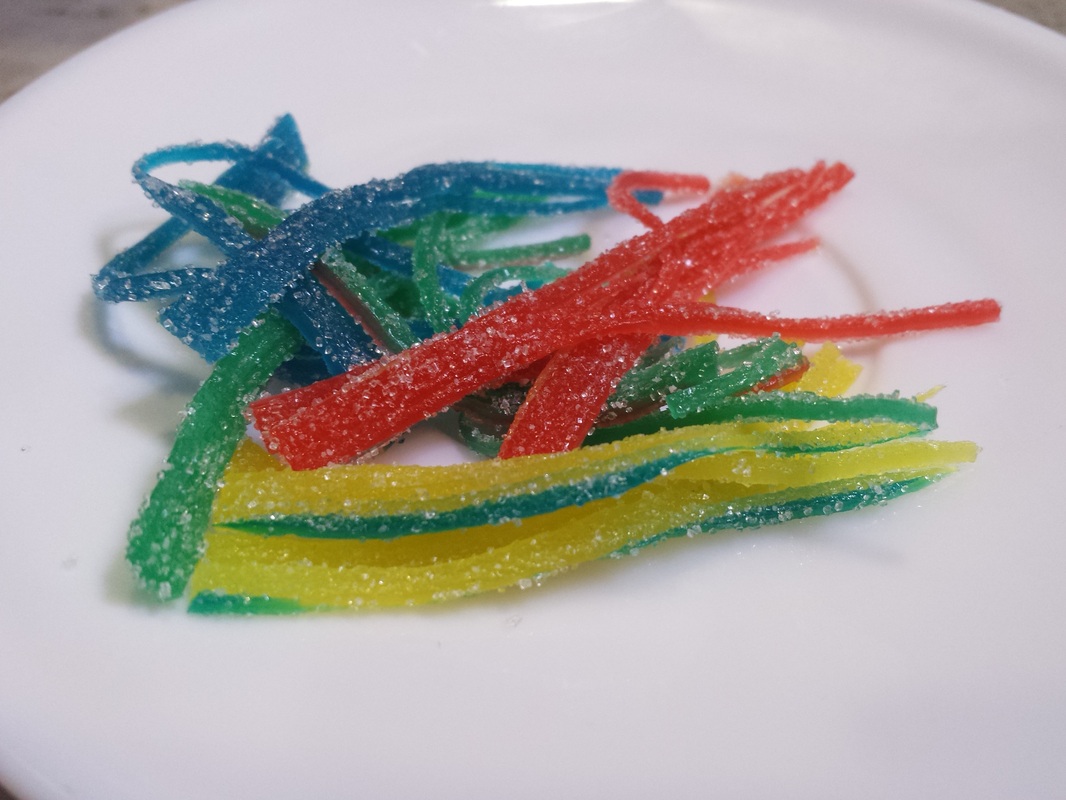
I bought this sour stripes strips to create the 'tail'. I have no idea what's that called. If you know, please guide me. Haha! In anyway, I cut the end of the sour stripes into 3 to 4, without breaking them. You can use fondant if you like.

Using some of the melted chocolated, dip some on the end of the uncut side and paste on the top of the hat. Don't mind my fingers, I had washed it thoroughly of course!
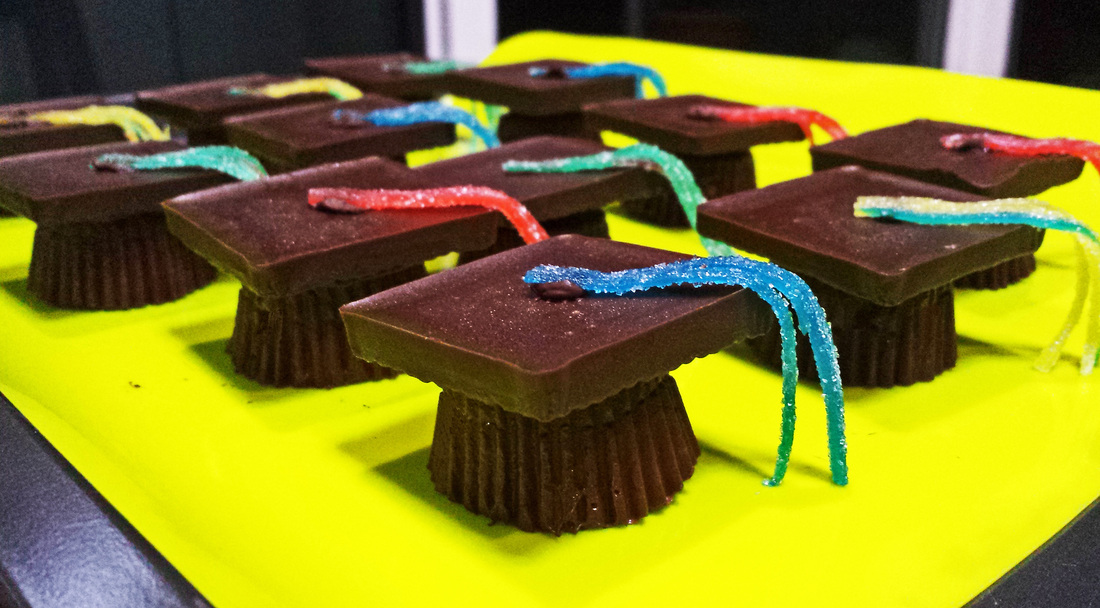
TATA!! Pretty and so cute aren't they? Love how they come out eventually, and they are definitely a star by itself when it is presented as a gift.
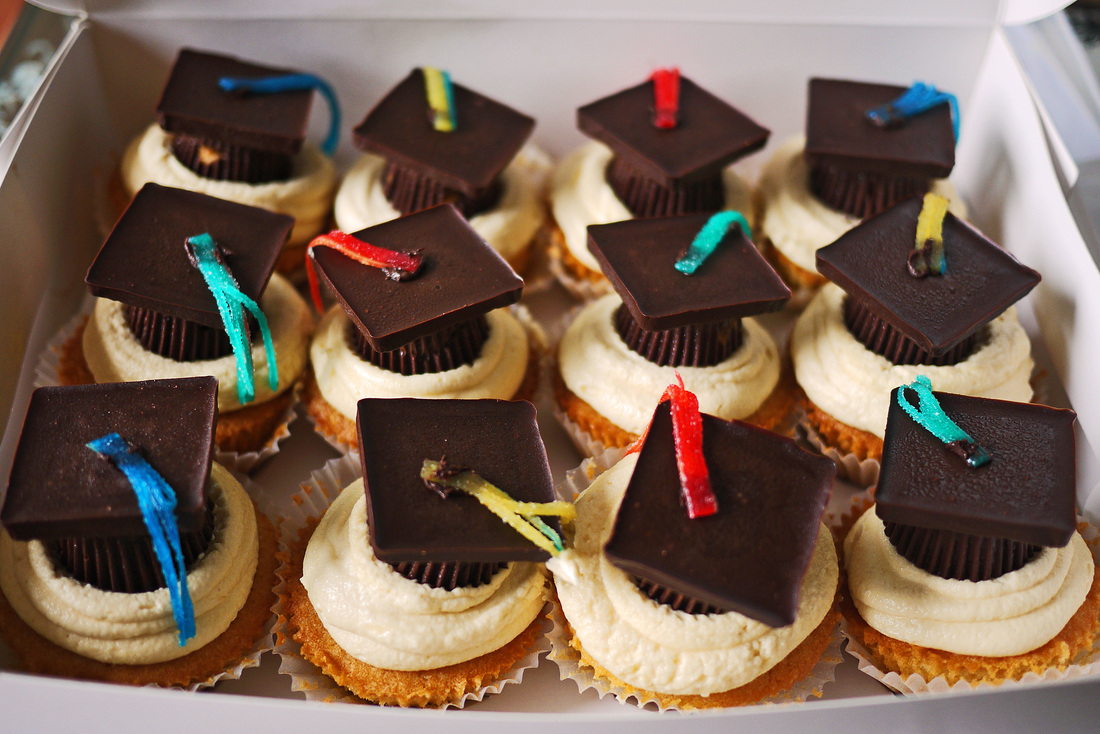
Place them on some cupcakes and you are ready to go and give them out!
Recipe: Makes 12 miniature graduation hats
Ingredients
250g chocolate, chopped finely, and set aside roughly 1/3 of the chocolate
40g peanut butter or any filling you desire, like jam (optional)
Strips of sour candy strips or fondant
Directions
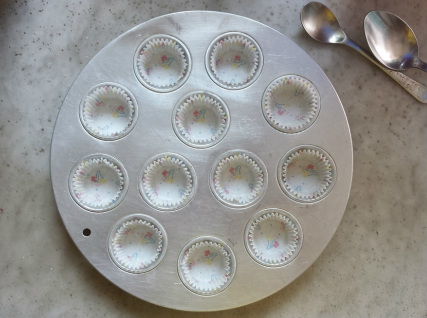
1) Line 12 mini cupcakes holes with paper liners. Prepare squarish chocolate moulds. If not using, cut the chocolate by half.
2) Melt 2/3 of the chocolate over double boiler, or in a microwave, till almost completely melted, stirring continuously. Remove from heat and stir till the chocolate has melted. Add the reserved chocolate into the melted chocolate and stir till everything is melted.
3) Using a teaspoon or a piping bag, carefully dip the tempered chocolate into liners, halfway if you want a filling in the middle, or fully if none. Add the peanut butter or any fillings in the middle and cover with the tops with the chocolate. Let them to set, either in fridge or aside.
4) Pour the rest of the tempered chocolate into square moulds, leaving some for later use, and let them to set. Meanwhile, cut strips of sour candy or fondant as into fine strips. At one end, cut them finely, as if they are string that dangle down from the top end. (See above photo)
5) When the chocolate is set, carefully peel off the paper liners, and unmould the chocolate from the square mould. Using the reserved tempered chocolate to glue the square chocolates to the base of the hat. Using some of the tempered chocolate as well, to glue the uncut ends of the sour candy strips or fondant to the top of the hat. Leave aside to set.
6) Place on desired cupcakes.
Ingredients
250g chocolate, chopped finely, and set aside roughly 1/3 of the chocolate
40g peanut butter or any filling you desire, like jam (optional)
Strips of sour candy strips or fondant
Directions
1) Line 12 mini cupcakes holes with paper liners. Prepare squarish chocolate moulds. If not using, cut the chocolate by half.
2) Melt 2/3 of the chocolate over double boiler, or in a microwave, till almost completely melted, stirring continuously. Remove from heat and stir till the chocolate has melted. Add the reserved chocolate into the melted chocolate and stir till everything is melted.
3) Using a teaspoon or a piping bag, carefully dip the tempered chocolate into liners, halfway if you want a filling in the middle, or fully if none. Add the peanut butter or any fillings in the middle and cover with the tops with the chocolate. Let them to set, either in fridge or aside.
4) Pour the rest of the tempered chocolate into square moulds, leaving some for later use, and let them to set. Meanwhile, cut strips of sour candy or fondant as into fine strips. At one end, cut them finely, as if they are string that dangle down from the top end. (See above photo)
5) When the chocolate is set, carefully peel off the paper liners, and unmould the chocolate from the square mould. Using the reserved tempered chocolate to glue the square chocolates to the base of the hat. Using some of the tempered chocolate as well, to glue the uncut ends of the sour candy strips or fondant to the top of the hat. Leave aside to set.
6) Place on desired cupcakes.

 RSS Feed
